


iRacing
iRacing Force Feedback Setup Guide
Force feedback is the main sensory connection between a driver and a sim. Without it, you will feel separated from the feel of virtual driving. Sim racing steering wheels have come a long way over the last 15 years; from gear-driven wheels to direct drive and everything in between. Manufacturers of wheels have always been chasing the idea of ultimate realism but in short, we will never reach real-life experience through force feedback alone. However, it is crucial to your overall sim driving experience.
This article will specifically be covering the settings within the iRacing platform, but there are general rules you can take away from this article on the correct ‘feel’ for FFB (Force feedback) and general differences between game settings and wheel settings (which are two separate things). At the end of this article is our Sim61 recommended setup process which you can skip directly to here. This process is a complete guide for setting and tuning your FFB correctly in iRacing.
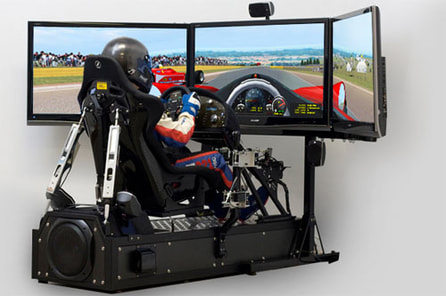
Without a motion simulator rig, you rely solely on feel through the steering wheel. Often you’ll hear real-world drivers explaining that they drive the car through their “bottom” which is a sensation unavailable to sim drivers. Having dialled-in FFB is therefore crucial to understanding how your car moves out on track.
What is Correct FFB?
A quick explanation describes FFB as the relative rotational force provided by the steering wheel to replicate the in-game steering wheel movements. When driving a real car, if you turn the steering wheel to the left or right, the wheel naturally wants to pull back to the centre. FFB should replicate that sensation.
It is important to understand that unless you own a motion rig, air-padded seats and vibration plates, the only way you will get any ‘real world’ feedback from a racing game will be through your FFB.
It is therefore incredibly important to have it set correctly. As you will discover in this article, there is no “one size fits all” setting. The main differences in settings come from two factors: the type of wheel you use and your personal ‘feel’ preference.
So a realistic FFB should be as close to real-life driving as possible. As a driver, you want to feel every kerb, every rumble strip and every bump in the road. Most importantly, however, you want to feel the weight of the car. When the car turns into a bend, the weight of the car moves onto the outside wheels. As the weight transfers, the force through the steering wheel will change.
When set correctly, you should be able to judge how the car is moving through the feeling in your hands: whether the car is understeering (feels light) or oversteering (sudden force) or even when the car is on its limit of grip. Professional esport drivers will have this setting dialled in and will always have complete control over the sensation of the car’s movement.
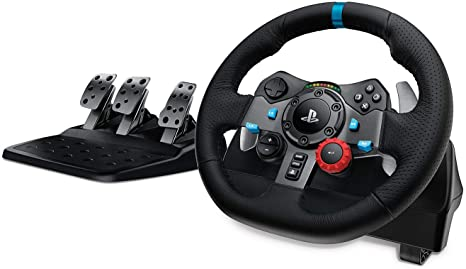
A point to note is that the type of wheel you use can limit how much feel. It is widely thought that direct-drive steering wheels provide better feel than belt-driven and gear-driven wheels. There is a great article written by simracingsetup.com that talks about the differences between them in more detail, which we would recommend reading.
Steering Wheel Firmware Settings vs. iRacing Settings
There is a lot of confusion when it comes to the differences between firmware settings and game settings. The two things are separate and need to be configured separately.
Firmware is your wheel’s specific settings. These differ from the brand and model of wheel you use. For example, Fanatec firmware will be completely different from Thurstmaster’s firmware. When you first install your wheel, often the manufacturer will provide a guide on how to set up and calibrate your wheel. Within these guides, you may have the option to control different properties of your wheel, such as FFB strength, lockout angle, dead zones, etc. It is important that you set these to your specific preferences via guidance from the manufacturer. This also needs to be done before you go into your iRacing settings.
Try these links for the manufacturers' setup advice:
AccuForce – Documents and Manuals (simxperience.com)
Fanatec – Fanatec Tuning Menu Tutorial – YouTube
Thrustmaster – Technical support website
Logitech - Support and Downloads website
Moza - Drivers and Manuals
Asetek - RaceHub download
iRacing Steering Wheel Settings
Before changing anything, make sure that you have the latest version of iRacing installed, if you’re not up to date, then iRacing will display a message, stopping you from entering any races. Click on the suggested link and follow the instructions.
Before adjusting anything (especially if this is your first time changing the settings) perform a wheel calibration by clicking the ‘steering’ box underneath the steering wheel diagram on the options page. Follow the onscreen instructions.
As I am sure you are aware, there are a lot of adjustments you can make and it isn’t always clear what each of these settings does. In this section, we will cover the settings directly related to FFB and wheel setup in iRacing so you can better understand how to adjust each one.
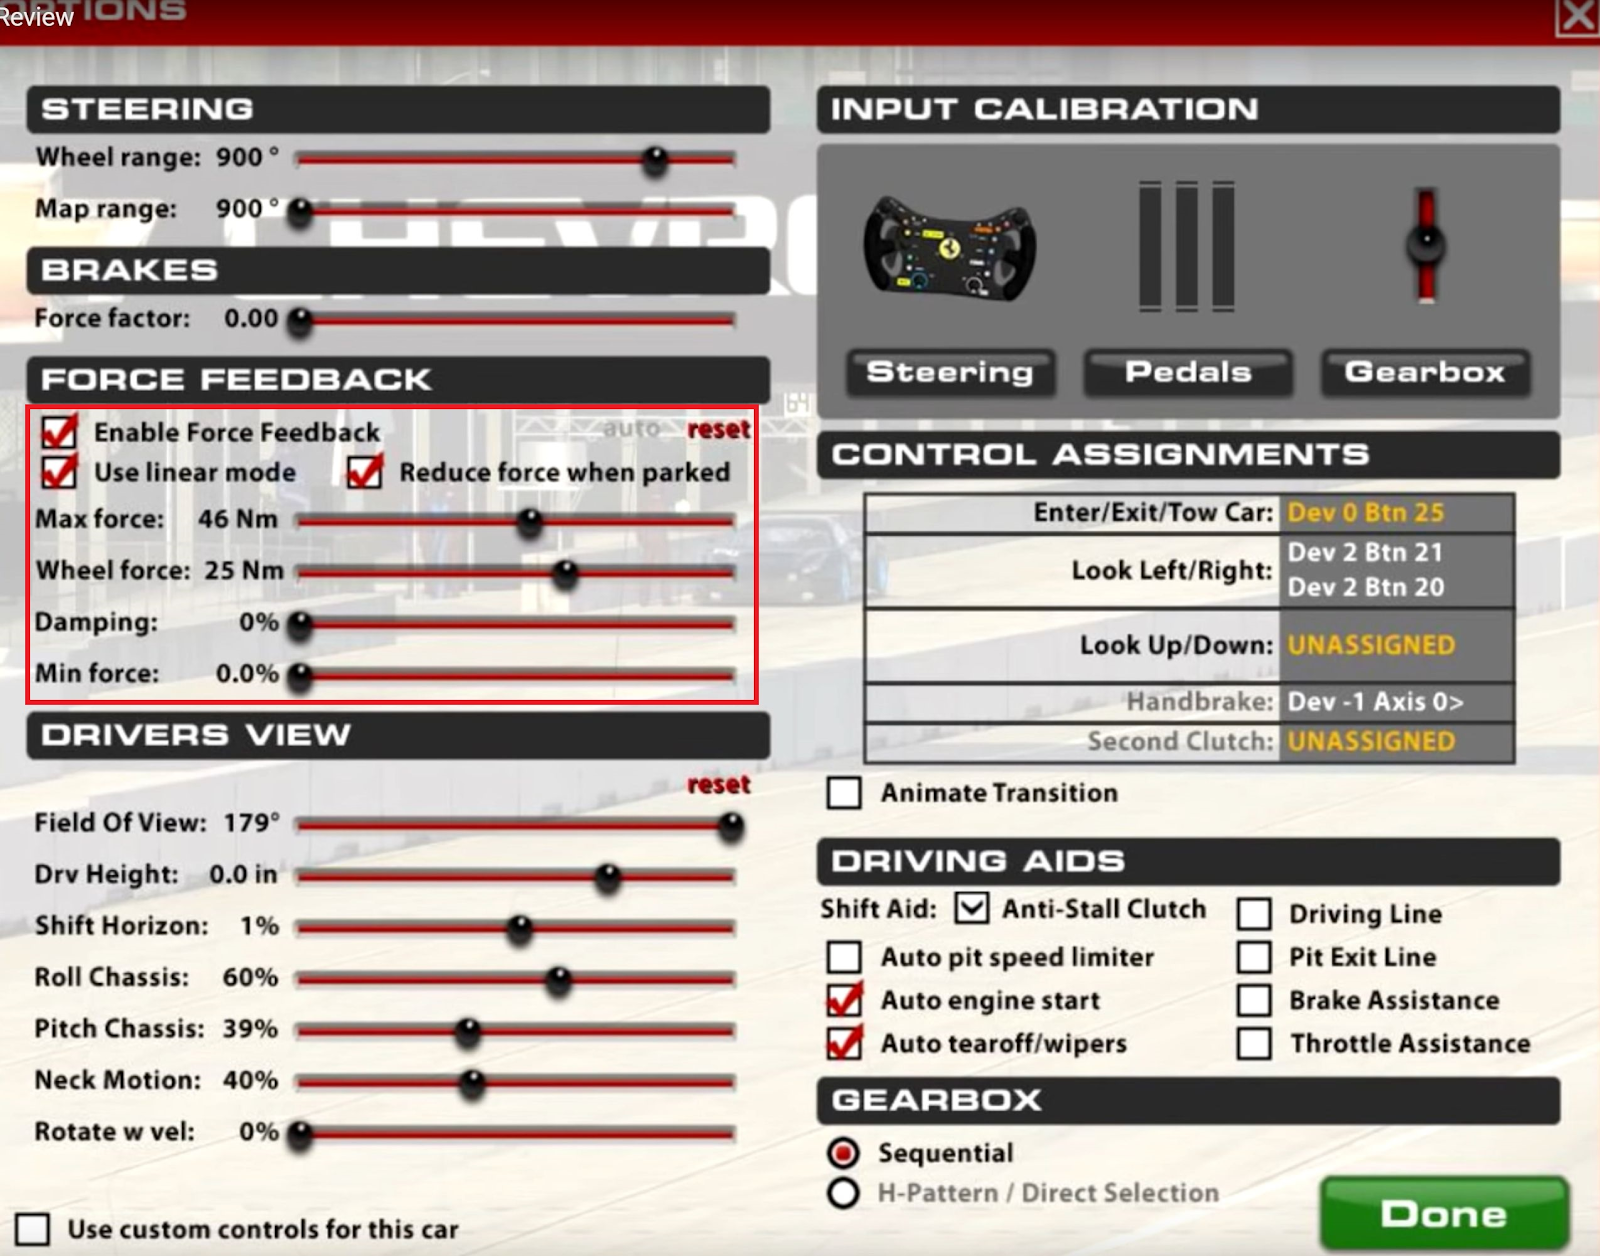
- Wheel Range – wheel range is the direct ratio from the virtual steering inputs to the physical wheel inputs. Set this at 900° and leave it. If you add more than 900, then your physical inputs will be dulled by the Sim, if you go below 900, your physical inputs will be exaggerated by the Sim
- Map Range – map from your wheel range to the virtual car’s range, if greater, to better support wheels with limited rotation. At slow speeds, the mapped range will equal the range of the car but will limit the car’s lock-to-lock ratio at speed to improve steering sensitivity.
- Enable Force Feedback – to state the obvious, this turns FFB on or off. If your wheel supports FFB, turn this on.
- Use linear mode – check this box if you are using a direct drive steering wheel. For belt and gear-driven wheels, leave unchecked. If you are unsure what type your wheel is, a quick Google search should tell you.
- Reduce force when parked – again, fairly obvious. When the car is parked (not moving) the steering becomes lighter and easier to turn. This is down to user preference.
- Strength – this is the maximum output force that will be given to the wheel. Our advice here would be to set this last. Go out on track for a test session and open the ‘Graphics adjustment’ tab. At the bottom of this list, you will see the ‘FFB Strength’ setting. Drive around for a couple of laps, without hitting any kerbs or unsettling the car, until the ‘Auto’ bar appears (F9 black box). When this comes on, set the FFB Strength to the recommended auto setting and this should put you at a good starting point for adjustment.
- Wheel Force – for this setting, you need to know your specific wheel’s Maximum Output Force (in Nm). Each brand and model of wheel will be different. You can again check this with a quick Google search of your steering wheel. Set ‘Wheel force’ to your manufacturer’s maximum force.
- Intensity - this setting applies only when Auto FFB is selected in the F9 black box menu. Intensity adds an extra calculation to the "auto" function to allow added headroom in the system. The Intensity slider works in conjunction with the Wheel force slider to create a weighted calculation based on how strong your wheel is.
- Smoothing - with zero smoothing the FFB signal is completely unfiltered. Adding smoothing helps tidy up the high-frequency noise in the FFB signal but also adds latency. Try to use as little smoothing as possible for the best FFB results.
- Damping – damping is the effect where iRacing smooths out the force effects felt by the car. 0% would be as close to real as possible, whereas 100% would feel like driving through butter. Your setting here depends on your type of wheel. For direct drive, you want a low percentage: 0-5%. For belt-driven wheels, try 5-10%. And for gear-driven wheels try 10%+. Lower percentages on entry-level wheels will feel notchy and jerky, so find a balance for this one by testing a few settings.
- Min force – set this to 0% usually. Min force applies a low-level force to the wheel when it is in a neutral position. When set to a high percentage, the wheel becomes more resistant to movements. Min force is most useful on entry-level wheels, such as the Logitech G29, G920, Thrustmaster T150 and Thrustmaster T300.
**At the bottom of the page, tick the ‘Use custom controls for this car’. This will save these specific settings for your current car. This will come in handy when adjusting multiple car’s settings.
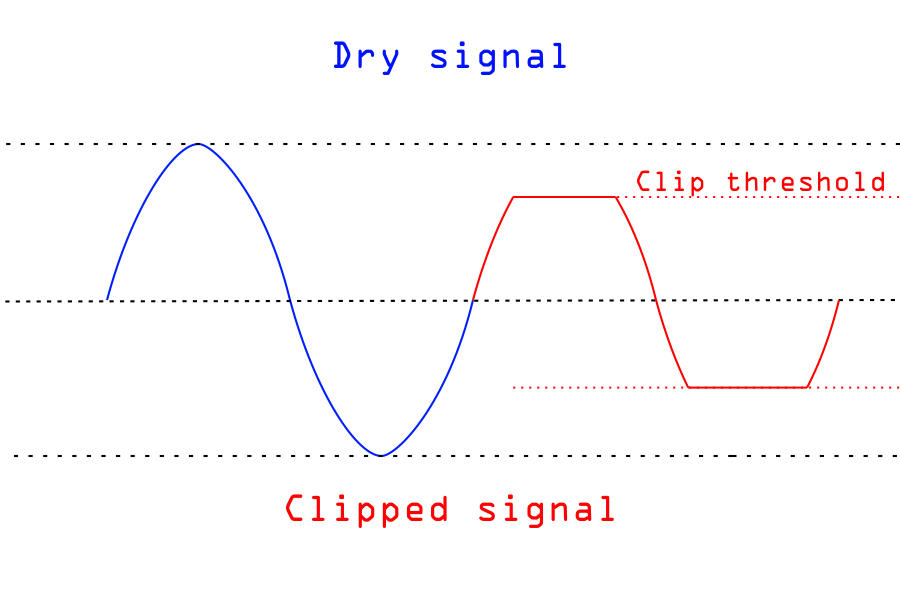
What is Clipping and How to Avoid It?
Clipping is essentially where the game outputs a larger force to your wheel than it is physically able to produce. This will create a ‘dead zone’ where the wheel operates at its maximum available output, leading you to lose feel.
As a driver, it will be difficult to feel when the car hits kerbs, vibrates or generates certain movements like snap oversteer.
To know if your steering wheel is clipping, you can press the ‘F’ key while driving. This will bring up the FFB window. The bar marked with an F is the force being given to the wheel. You do not want this bar to go red at any point on the lap. If it does, this means that your wheel FFB is clipping. Ideally, you want this bar to be hitting the orange zone when at high force.
You can now adjust the ‘Strength’ setting in the options tab to move this out of the red. This might be a trial and error process before you find something that fits. Also, be aware that different tracks will have different loads. Similarly, different cars will also produce different forces, so this clipping limit will change (you’ll need to adjust Strength from car to car or track to track).
Once you have your iRacing FFB settings nailed down, why not check out our AI-powered driver coaching tool trophi.ai? It’s free to sample and provides helpful advice to help you become a better and more consistent sim driver in iRacing, Assetto Corsa Competizione, F1 24 and Rocket League.
iRacing FFB: Our Six-Step Process
1 – INSTALL AND CALIBRATE YOUR SPECIFIC FIRMWARE
Each wheel manufacturer has a recommended installation process for their products. Brands such as Fanatec and Thrustmaster also have their own recommended settings that need adjustment before you get started.
2 – RUN iRACING CALIBRATION
Perform this action to ensure that the wheel is functioning as it should.
3 – FFB OPTIONS SETTING
Check ‘Enable Force Feedback’, ‘Use linear mode’ (for direct drive only) and ‘Reduce force when parked’. Set ‘Wheel force’ to your wheel's maximum output. You may need to Google your wheel’s maximum output if you are unsure what to set it to.
4 – TESTING
Set ‘Damping’ and ‘Min force’ to 0. For belt and gear-driven wheels, damping will need adjustment: make changes between 5% and 20%.
5 – USE THE AUTO BUTTON TO SET MAX FORCE
When on track, use the ‘Graphics adjustment’ window to set the FFB Strength using the ‘Auto’ function. Avoid any kerbs or sudden shocks to ensure that an accurate setting is calculated. Repeat this step until you have an average reading. This will be different depending on the car and track.
6 – ADJUST AND FINESSE
Like with all motorsport, FFB settings all come down to driver feel. Adjust ‘Damping,’ ‘Min Force’ and ‘Strength’ settings until you are comfortable with how the car is performing. Always check for clipping to ensure you are making the most of your wheel’s potential.
Written by the teams at trophi.ai and Driver 61.